python Amazon Rekognition detect_labelsその2
※若干プログラムを修正しました。
はじめに
Amazon Rekognitionで分析した画像にBoundingBoxとラベルを表示させてみる。
準備
事前に下記の画像をAmazon Rekognitionで分析させてJsonファイルを取得しておく。

下記のプログラムを用意する。
- detect_labels.py
import boto3, sys, json, cv2, math, os, traceback

#detect_labelsで画像の分析結果を返す
def detect_labels(in_image_file):
    client=boto3.client('rekognition')
    #写真を読み出して、Byte変換して送信
    file = open(in_image_file,'rb')
    response = client.detect_labels(Image={'Bytes':file.read()}, MaxLabels=30)

    return response

#BoundingBoxを設定して返す
def set_bounding_box(image_file, label_name, instances):
    #画像の高さと幅を取得
    imgHeight, imgWidth = image_file.shape[:2]

    for instance in instances:
        left = math.ceil(instance['BoundingBox']['Left'] * imgWidth)
        top = math.ceil(instance['BoundingBox']['Top'] * imgHeight)
        width = math.ceil(instance['BoundingBox']['Width'] * imgWidth)
        height = math.ceil(instance['BoundingBox']['Height'] * imgHeight)

        image_file = cv2.putText(image_file
                                , label_name
                                , (left, height+top)
                                , cv2.FONT_HERSHEY_PLAIN
                                , 2
                                , (255, 255, 255)
                                , 2
                                , cv2.LINE_AA)
        image_file = cv2.rectangle(image_file
                                , (left, top)
                                , (width+left, height+top)
                                , (0,255,0)
                                , 2)
    return image_file

if __name__ == '__main__':
    if len(sys.argv) != 3:
        exit()

    in_file_name = sys.argv[1]
    out_file_name = sys.argv[2]

    try:
        #jsonが無ければ分析あれば使う
        json_file_name = in_file_name + '.json'
        if (os.path.exists(json_file_name) == True):
            file = open(json_file_name, 'r')
            response = file.read()
            response = json.loads(response)
        else:
            response = detect_labels(in_file_name)
            file = open(json_file_name, 'w')
            file.write(json.dumps(response))

        #分析元の画像を読み込み
        origin_image = cv2.imread(in_file_name)
        after_image = origin_image.copy()

        #画像にBounding Boxの設定
        for label in response['Labels']:
            #信頼が90未満の場合設定しない
            if label['Confidence'] < 90:
                continue
            #Instancesが無い場合は設定しない
            if not label['Instances']:
                continue

            after_image = set_bounding_box(after_image, label['Name'], label['Instances'])

        #結果の出力
        if after_image is not None:
            cv2.imwrite(out_file_name, after_image)
    except Exception as e:
        print(e)
        print(traceback.format_exc())
実行方法
python boundingBox.py bef.jpg aft.jpg
実行結果
Bounding Boxを付与したイメージが以下となる。
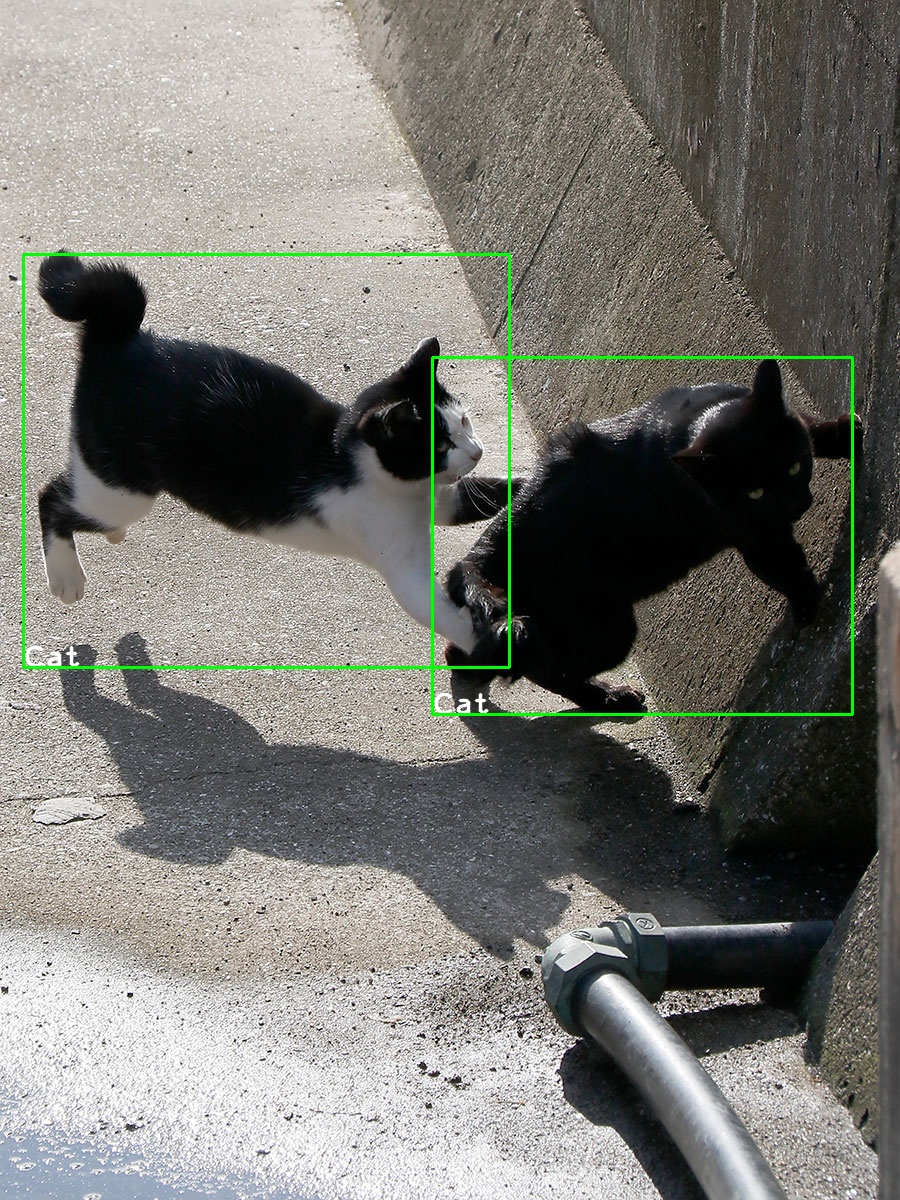
if labelName != 'Cat'をしている理由は別の画像だとCatとDogが混じっていることがあるのでCatに限定した。
本来はConfidenceの高い方を優先するロジックのほうが良さそう。
また、CV2は小数点が使えない感じだったので、math.ceilで切り上げをしている。
追記:Confidenceが90以上のlabelを採用し、Instancesが無いものは設定対象外とした。
まとめ
せっかくBounding Boxがあるので表示してみた。
CV2の使い方もわかって面白い。